- Concrete Ponds :
1- Step By Step Instructions For Building A Concrete Fish Pond In Your Garden.:
courtesy to : www.visuallandscapingadelaide.com.au/how-to-build-a-concrete-fish-pond


If you’re looking at creating an attractive water feature for your garden, yourself, consider a concrete fish pond. Not sure how to build a pond? Well read on because I’m happy to show you how to build a concrete pond with just 10 steps. As a professional landscaper for over 25 years, these instructions on how to build a fish pond outside in your garden are what I follow when asked to build ponds for clients.
1- Select a suitable area for your pond.
You will require a filter, pump or both, so make sure there’s an electrical power point near by. Try to place the pond away from trees; especially if they drop leaves, you will be creating a lot of maintenance removing them from your pond. Tree roots from close trees and shrubs may also cause issues.
2- Mark the outline of your pond.
Using rope, mark the outline of your pond and streams. Kidney shapes are popular pond designs; you probably want something that is not too symmetrical to make your concrete garden pond look as natural as possible. It is also a good idea to leave enough area around you pond for landscaping with rocks and plants. Once you are happy with the shape, use spray paint to paint the outline of your pond.
3- Excavate the pond
After verifying that there are not any buried utilities where you plan to dig, it’s time to excavate. You can either dig your pond with a shovel or rent a back hoe. Your pond should be dug with a variety of depth levels so you can utilise these levels as shelves for water plants. To build these shelves, you need to hand dig the edges of the pond with a shovel to get the chiselled edges you desire. Plan on having your perimeter edge at least 10cm above the desired water level of the pond. Allowing for 200mm of concrete, dig your hole to about 800mm deep in the middle, so you will end up with water about 600mm in depth.
4- Allow for the overflow drain
To make sure that when the pond gets full during a heavy rain, it does not flood your garden, you will have to make sure you install a drain that connects to the storm water pipe. The water level you desire in the pond should be about 25mm below the level of the drain.
5- Allow for your filter
Filters are definitely required if you are building a concrete fish pond, to keep the water as clean as possible. There are many on the market, some contain biological filters, with the more expensive ones allowing for easy cleaning and ‘back washing’. It is a good idea to have easy access to your filter and they are often placed into the ground, hiding them from site if access is from the top.
Finishing touches :
Your concrete garden fish pond is now complete and is ready to have some landscaping around your pond area. Trim away any of the forticon plastic, leaving about 100mm of the plastic when trimming then bury it with small stones. When your water level reaches the desired level, turn on your pump and let it begin to work. There will be a great deal of cloudiness in the pond from the dirt and rocks. It will go away in a couple of days. Let the water in the pond sit for a few days before adding any fish or plants to it. You can add large rocks around the edge of your garden pond, ornaments bought from garden supply shops, seats or like we did for this garden fish pond, a crazy paved slate platform to view the fish. This was achieved by laying a 100mm reinforced concrete pad, laying the pieces of slate before finishing with a black oxide grout.
Low voltage garden lighting is available from most hardware shops and makes the pond a spectacular sight at night.
6- Line with ‘Forticon’ plastic and mesh
Using a heavy duty forticon plastic which acts as a water proof membrane completely cover your pond area. If there is more than one section, be sure to overlap them a few inches. Do your best to make the plastic conform to the shape of your pond and plant shelves. Don’t trim the extra forticon plastic until you have filled the pond. Next lay down a heavy duty mesh which gives added strength to the concrete
7- Pour the concrete
It is very difficult to gain a good structural integrity of the concrete across a large area by mixing up concrete from bags yourself. A truck delivered the concrete pre mixed with a waterproof additive which was then poured in using a wheel barrow and ‘trowelled’ into place.
8- Add river pebbles
River pebbles provide surface area for necessary bacteria as well as adding natural beauty to your concrete pond. Start by placing the pebbles on the vertical walls, working your way down, stamping them into the concrete while it is still wet; you could also add some larger rocks if you wish as focal points. Once the walls have been covered, fill the horizontal areas with pebbles to a depth of about 500mm.
9-Install the overflow drain :
Connecting the overflow drain to the storm water pipe means digging a trench and should be done with a great deal of care. A licensed landscaper should be called upon to make sure the connection is sealed correctly if you are in anyway unsure about what you are doing.
10-Install the pump and filter
Typically your pump sits in the pond at its deepest point, pumping the water up through a filter which is then returned to the pond by way of a waterfall or as in this case, a ‘swale’ was formed to provide a creek bed; also covered with river pebbles that drains into the main pond. Flexible hosing of 40mm was used to connect the pump to the filter and to the creek bed.
You can now fill your concrete fish pond with water from a garden hose.
Add Water
Add River Pebbles
2- How to Mix Mortar
courtesy to : www.clarkekoi.com/how-to-mix-mortar.html
Mortar can be useful in pond building. if mixed and applied correctly, it has superior adhesion when compared to waterfall foam and is less costly. It also allows for leveling and raising stone etc. and when bed onto liner, it keeps stone in place and the water from disappearing in the stone
About Mortar
As it pertains to ponds, mortar is great for bonding stones in waterfalls, leveling stone, and to direct and contain water. It is important to realize neither mortar or concrete are inheritably waterproof. To create a waterproof structure there are several options
For one, a liner should be placed underneath the stone. I have seen a number of leaking concrete ponds & waterfalls without a liner placed underneath. Waterproofing powders/mixes can also be added to the mortar mix to create a water tight seal. Liquid rubber or fiberglas can also be painted on a cured concrete thereby rendering it watertight
The big key with mortar or concretes that it should be allowed to cure slowly so that the chemical reaction is properly completed. If the mortar does not cure properly it will not have any strength. To slow the drying process, the mortar should be sprayed down with water several times a day in order to keep it moist. In excessively hot weather it should be covered with burlap to stop it from drying out rapidly. Also make sure not to add too much water creating a sloppy mix as this lessens its strength
Concreting Pond
Concrete Garden Fish Pond


Ingredients :
You can buy ready mix mortar in a bag or mix the constituents on your own. I prefer to mix my own. When you mix your own, you can control the ratios. For example I prefer a mixing ratio of 1:0.5:3 - 1 part portland, 1/2 part masonry and 3 parts sand. Type S cements are stronger than type N and should be chosen. Soft sand is also desired over gritty sand when doing stone work. Masonry cement provides a strong bond as well as being able to deal with freezing and thawing. Portland cement supplies flexural strength and adhesion
Tips
When applying mortar to rocks, it is a good idea to prep them with a wire brush. This is easily accomplished with a cordless drill. This cleans any dirt and loose debris away. You should also wet the stone or even apply a slurry mixture made of portland cement and bonding agent
When stacking the stones, pack the mortar in as best as possible and be aware of aesthetics. It is usually not advisable to stack more than 3 stones [2 layers of mortar between the 3 layers] before letting the mortar cure - stability or placement will likely be an issue if you do. The use of shim stones also helps maintain postponing, and a level is required to ensure a forward slant and left to right placement. Of course waterfall foam is a good alternative to mortar and it is particularly advantageous when trying to get a quick seal and bond between liner and stone
3- How to Waterproof a Concrete Koi Pond:
courtesy to : homeguides.sfgate.com/waterproof-concrete-koi-pond
Notes:
Make sure the soil is elevated around the pond so that water doesn’t drain into it. Most of the dirt from digging your garden fish pond may come in very handy in making sure your perimeter edge flat, creating higher ground for your stream, build areas for landscaping and to burry your flexible piping.
A cheaper alternative is to use a flexible liner instead of concrete; which we do not recommend. If you are however contemplating this, use one made specifically for ponds or pools. Otherwise, it may break down upon exposure to ultraviolet light, and can even be toxic to your fish.

A concrete koi pond adds interest to the landscape by providing habitat for these colorful fish. However, concrete is a porous material and can eventually leach lime and other chemicals into your pond unless you seal the pond with a waterproofing compound. The market provides different products that provide a flexible, rubber-like, waterproof coating for your concrete pond. Choose a product that is nontoxic and recommended for koi ponds. Ensure proper application by starting with clean concrete, free of dust, debris or living vegetative materials clinging to the surface.
Cleaning :
1- Spray a broad-spectrum herbicide on concrete surfaces with living vegetation attached. Follow label directions for mixing the herbicide with water
and application procedures. Wait until vegetation turns brown before moving on to the next step.
2-Remove dried vegetation with a power washer -- with the nozzle pointed at a 45-degree angle -- or scrape and brush the material off the concrete surfaces.
3-Prepare a cleaning solution with water and a few squirts of dish detergent or laundry detergent.
4-Brush concrete with the cleaning solution and rinse thoroughly. Allow the concrete to dry.
5-Brush new concrete with a stiff brush to remove calcium sulfate -- concrete dust -- on the surface. Rinse the concrete and allow it to dry thoroughly before proceeding to waterproofing steps.
Waterproofing :
1- Repair cracks in the concrete before you apply waterproofing materials. To ensure compatibility, use repair tape and bonding materials of the same brand as the primer and waterproofing agent. Follow the manufacturer's instructions for making repairs.
2-Apply a coat of primer, using a brush, nap roller or pressure pot applicator to thoroughly dry concrete following product instructions.
3-Allow the primer to dry according to product instructions before you apply the first coat of waterproofing product.
4-Spray, roll or brush on the waterproofing product. Allow the recommended drying time between coats. Apply two coats, or the manufacturer's recommended number of coats. Pay attention to the manufacturer's recommendation for coat thickness to obtain the recommended mileage of your finished product.
Things You Will Need :
-Stiff brush
-Scraper
-Plastic bucket
-Dish detergent
-Shop vac
-Pressure washer (optional)
-Herbicide (optional)
-Nap paint roller (optional)
-Paint brush (optional)
-Pressure pot applicator (optional)
Tip :
Watch the weather forecast before you begin your pond waterproofing project. Make certain you will have enough rain-free days for cleaning, waterproofing and curing.
4-How to Seal Leaks in a Concrete Pond :
Even a well-maintained concrete-lined pond can develop cracks over time, causing the pond to leak. Repairing damage can be a tedious and difficult job, because the pond probably will be full of water and algae or plant growth. Many products can seal a concrete pond while curing underwater, meaning you don't need to drain or clean the pond. One of the easiest products to find is hydraulic cement, also known as leak-stop or quick-set, which is often used in home repair to stop leaks in damp areas.

1- Put on the rubber gloves. This will protect you from the cement and any materials in the pond.
2-Clean out the leaking crack with a wire brush to remove debris and any organic growth.
3-Mix the cement with water in a small container using a wooden stick or paddle. Read the instructions for the correct ratio of cement-to-water. The cement should feel like putty. Only mix a small amount; you can mix more than one batch.
4-Scrape the cement out of the bucket and mold it into a ball in your hand. When it starts feeling warm, it is ready. Quickly press the cement into the crack and hold it there for about five minutes. Use a putty knife to scrape away excess and smooth the repair before it becomes too hard. You must work quickly; the cement starts to cure in as little as 30 seconds and can be hard within five minutes.
Things You Will Need :
-Rubber gloves
-Wire brush
-Container
-Wood stick or paddle
-Hydraulic cement
-Putty knife
Tip :
Concrete can change the pH of your pond. If you have fish, this can cause problems, particularly if you need to use a lot of concrete. You might need to use chemicals to change the pH of the water or take other precautions to protect your fish.
Warning :
Wear protective goggles when working with concrete.
5- Pond Construction with Concrete:
courtesy to : www.pondtrademag.com/pond-construction-with-concrete/
By Demi Fortuna, Atlantic Water Gardens
Published on January 1, 2013
Cement Through the Ages
Concrete and mortar have been favored by pond and fountain builders since the Roman Empire, and the formula has changed little in the past 2000 years. Limestone and clay are mixed, heated and ground to the silky powder we call cement. Concrete is made by adding water, sand and gravel to the cement, while mortar refers to a finer sand and cement mixture used for bonding brick and stone
Our modern formula was first cooked up on a stove in 1824 by British inventor Joseph Aspdin, a real ‘kitchen chemist.’ He named it Portland cement for its similarity to stone from the nearby Isle of Portland, but it’s basically the same stuff that built Ancient Rome.
Properly mixed and applied, under the right conditions concrete can last a very long time – the intact, magnificent roof of the Pantheon is still the world’s largest unreinforced concrete dome almost two thousand years after it was built. Roman aqueducts and fountains built two millennia ago are still in daily use today. That said, concrete is NOT a “set it and forget it” material. There are a number of requirements to be met if it is to last.
Cement and Water
Portland is hydraulic cement, meaning it hardens and cures upon contact with water, but the exact process is so complicated that we don’t fully understand it even today. The proper amount of water is critical in mixing concrete – too little won’t fully hydrate the mix, leading to an uneven cure and too much will weaken it. The curing process doesn’t stop with mixing, either. Concrete needs to be kept evenly moist for as long as feasible after pouring to develop its full strength, at least 3 days, but it will continue to strengthen for a year or more if kept moist.
Untreated concrete is usually quite porous, absorbing and allowing water to slowly seep through microscopic spaces, but it can be made highly resistant to the passage of water by using fine aggregates and waterproofing additives to close the pores. This makes it an ideal material for ponds and waterfalls in warm weather climates, where prolonged freezes aren’t an issue. In colder areas water trapped inside the concrete can freeze, expanding from within and causing cracking and spalling. Ice sheets on the surface of the water can force walls apart, causing structural damage and leaks. Damage from frost is usually progressive if left unattended, so temperatures below 32°F are a cause for concern and require different strategies than warm weather water features.

Foundations for Concrete Structures
Concrete has tremendous compressive strength, capable of supporting thousands of pounds per square inch, but doesn’t bend or stretch very well, so the most critical requirement of any concrete structure is a proper foundation, set on undisturbed soil that will not move or settle. In colder climes footings must be set below the frost line to avoid movement during freeze-thaw cycles, usually 3 to 4 feet below grade.
That may sound very deep, but if we’re considering the expense of concrete to start with, then we’re generally talking about a more elaborate pond, perhaps a koi pond where the deeper the water is, the better. Most koi ponds are deeper than the frost line, into undisturbed soil, so the depth of the footing is often of no great concern. We’ll usually dig out the pond as carefully as possible first, leaving the walls vertical, then we’ll excavate the trench for the footing at least 8˝ deeper than the rest of the pond, always below the frost line and at least 12˝ wide, to provide a solid, stable base that’s a little wider than the walls.
We pour the footing level and set some kind of ‘key’ to lock the walls to the footings. This can be as simple as regularly spaced rebar rods set into the wet concrete, or a groove in the top of the footing that the wall can lock into. An 8˝ x12˝ footing may sound like overkill, but it ensures the walls will stay straight and solid and support any load likely to be set on them, and with 8˝ walls the 12˝ wide footing provides a 4˝ shelf that the floor will key into later.
Waterproofing :
There are three different ways I know of to waterproof the concrete pond, all starting with the solid foundation just described.
The first method is the conventional way to pour a fully waterproof concrete shell. The pond is excavated, a footing poured, the appropriate reinforcement rods and wire set in place and forms built. Latex or acrylic waterproofing solutions are added to the mixing water, to close the pores in the concrete and eliminate seepage through the walls. The concrete must be carefully mixed and vibrated into place to eliminate air bubbles, and the additives can be costly, but in warm climates where frost isn’t an issue this method works very well. Although the entire shell of a good-sized pond can be poured all at once by an experienced crew, we prefer doing the footing first, then pouring the walls, then the floor, sealing the seams between the three elements with waterstop gasketing. The flexible gasket is set on the footing before the wall is poured on top of it, sealing the joint from the inside as the gasket swells on contact with water. We’ll place an expansion joint vertically on the inside of the wall and a second gasket on that 4˝ shelf at the base of the wall before the floor is poured, to form an elastic seal that allows for expansion and contraction of the floor. The coping is set on top of the walls with a simple, strong, waterproof mortar made by mixing one 45lb. bag of thinset to two 70lb. bags of Type S mortar, a great mix I first heard about online from Doug Hoover of Aquamedia (many thanks for giving this great formula away for free!) This method of pond construction is effective, permanent and fully waterproof as long as there are no cracks, so it’s ideal for the Southern States and the West Coast. It isn’t optimal where freeze-thaw cycles are a concern.
The second method dispenses with the cost and additional labor of integral concrete waterproofing by applying a waterproofing coating on the inner surfaces of the pond after the shell is constructed, and it works with either poured shells or with cinder block construction. There are many types of coatings, ranging from liquid EPDM rubber compounds to two-part epoxies to cement-based slurries to simple paints, so there’s a waterproofing compound for every job. The more elastic preparations bridge small cracks and even tolerate a small amount of movement, so they can be very forgiving and are often used to waterproof leaking existing concrete ponds. The key to these applications is proper surface preparation, so the manufacturer’s instructions must be strictly followed. The more stable the base, the better the coating will perform, so this method of pond construction also works best where winters are mild.
Both of these methods are well known and the steps involved in their construction well documented, so I won’t go into further detail, but unless you’re planning on draining the water feature for the winter, we’ve found neither is ideal in harsh winter country. Where we build, in the mildest area of New York, a hundred freeze-thaw cycles is a gentle winter, temps regularly visit the 20’s and we can stay below freezing for weeks. We needed a way to permanently waterproof concrete regardless of weather, so we developed a simple way to construct a concrete pond so it will always stay completely sealed under all conditions. We combine flexible and concrete liners. Burying a flexible liner inside a concrete wall offers advantages over either method alone. In contrast to straight concrete, seams and small cracks cannot leak, so integrated gaskets, waterproofing additives and coatings are unnecessary, and freeze-thaw cycles are no longer a concern. In contrast to liner ponds, the waterproof EPDM or PVC membrane is fully encapsulated between geotextile layers surrounded by concrete, permanently protected from sunlight, weather, wear and vandalism, so it’s ideal for harsh conditions or public water feature construction sites.
Although liner and geotextile is an additional expense over plain concrete or cinderblock, it is usually comparable to the cost of acrylic additives or two-part coatings, and typically less expensive than sprayed polyurea foam, and it involves little additional technical expertise. This isn’t brain surgery. On the contrary, this simple, obvious method is easier and more tolerant of adverse conditions or less-than-ideal preparation, so we’ve found it adapts well to any jobsite.
Hybrid Liner/Concrete Pond Construction
We tried, with some success, to simply skim-coat EPDM liner with a couple of inches of cement, but found the simple way wasn’t so simple – the liner was vulnerable to penetration from sharps in the ground, tree roots and even shifting soils that settled and exposed the membrane, not to mention those hideous destructive juggernaut, rodents (hint: Chip and Dale do bite).
Nowadays, we’ll build outer walls on a solid footing just like the first two methods, either pouring or mortaring cinder block in place; the type and thickness depend on the application. If we’re going to pour the walls, the soil can serve as the outer form for the pour if we’re careful and cut the walls vertical.
If we’re going to use block we make the excavation a little wider all the way around so there’s a little room to work: we’ll backfill after the walls are set. We always use galvanized wall reinforcement, like Durawall, between our courses of cinderblock and we fill each course with concrete – the small additional expense adds tremendous strength and resistance to displacement. The walls don’t come all the way to the level of the water surface; we stop 8-10˝ below the intended water level to create a Rock Shelf for the natural rock coping to come. Once the walls are in, we backfill and level the soil behind them to create a broad shelf for the coping (and any Perimeter Bogs we might install behind the coping).
We’ll be pouring the floor last, but we need to grade the floor out now so we can cover the entire excavation – floor, walls and Rock Shelf – with a non-woven 6oz. geotextile, leaving plenty of extra to pull up behind coping and bogs to above water level. Our waterproof liner, usually 45mil EPDM, goes over the geotextile, again leaving enough above the walls to cover the shelf then come up another foot to well above the water line. We could cover the liner directly with concrete at this point, but we’ve found it’s both safer and much easier to cover the liner with another layer of geotextile, not just for protection, but because cement sticks to it like crazy, even vertically.
The final step is to cover the liner/geotextile ‘sandwich’ completely. Depending on the job, we may build both inner and outer walls of 4˝ block, or spray cement stucco over the geotextile, 3/8˝ at a time, with our little Tirolessa sprayer that we absolutely love for smaller jobs. Finally, we dump out a rich, fiber-reinforced mix on the floor a wheelbarrow at a time and trowel the sides and bottom smooth, working our way out as we go. We leave at least 3˝ on the floor and 2˝ on the walls, and the ‘gorilla hair’ type poly fibers help keep the cement in place even if it cracks or crazes on the surface.
Consider creating a design or covering the floor with pebbles if the job warrants a special touch – it’s always appreciated, even if it’s rarely seen after the pond grows in. The coping goes in last, with the largest stones mortared in with that 140lb mortar/40lb thinset mix.
For koi ponds, we lay in smaller stones dry in front of Perimeter Bogs, simple gravel beds 6 to 8˝ deep on 2 to 3-foot wide areas of the Rock shelf with the liner pulled up at the outer edge, so water can filter in and get filtered by the roots. Look up Active Bog Filtration for some really cool ideas to keep koi ponds algae-free.
Winding up
There isn’t enough room on these pages to go into greater detail, but I hope I’ve given you the idea that concrete can be a great option.
In warmer areas concrete ponds:
• can be built and waterproofed many different ways, so they’re easily adaptable to most sites; • provide strong, lasting, virtually limitless structure regardless of soil conditions; • can be shaped and smoothed to make cleaning easier and safer than liner ponds; • properly constructed and waterproofed, are very low maintenance; • offer resistance to damage and vandalism that bare liner, or even gravel-bottom ponds cannot match.
In colder climates, using a membrane buried in the concrete shell to waterproof the pond offers all of the previous advantages, and is impervious to leaking from cracking and crazing that’s almost inevitable where winter holds an icy grip. Maintenance is even lower than in the warm weather ponds, since there’s no coating to scratch or wear off and settling cracks do no harm, and the liners can last virtually forever protected by their stony armor.
There’s no reason to shy away; concrete is far easier to use than ever before, thanks to advances in additive technology and delivery systems, and adding an impermeable liner makes ponds that are literally bulletproof. We’ve used this technique for ponds from 250 to 10000 gallons, and I’m pretty sure it’s adaptable to much more than I’ve run into. Give concrete construction a try next time you need a long-lasting, low maintenance, virtually indestructible pond.
Contact me at demi@atlanticwatergardens.com
Here we discuss Koi pond construction in some detail, using as an example, a formal stock pond recently constructed for our own business. The pond featured below is an above ground pond utilising modern gravity filtration, and is heated.
It features simple design and construction methods and was required as a show pond for high grade Koi but was also designed to show as much plumbing as possible, so that we could answer as many of the inevitable questions relating to the peculiarities of a modern Koi pond, its construction techniques and maintenance issues.
Before we dig the first spadeful of earth, it is vital with any Koi pond to have a design formulated and written down and on which the construction will be based. Clearly, with so many design possibilities, and with limited experience of Koi pond construction, it can be very difficult to choose the ideal design both in terms of what is really desirable and what will really work well. There is no doubt that the acquisition of a good book on the
subject and/or studying the many web sites covering Koi husbandry will help enormously not only with the type of design to be chosen but also with the actual construction techniques employed. Hopefully this web page will help further before you begin your pond building project.
In our case, the important criteria was to best utilise a small area of available space previously used to house 400 gallon stock ponds for baby Koi adjacent to our main stock ponds. The objectives were:- 1. to construct a show pond which would show off Koi to their best in both one year old and two year old sizes. 2. Be easy to maintain. 3. Incorporate oversized filtration because of the stocking densities envisaged. 4. Incorporate heating for temperature control and 5. Incorporate an Ozone system for ultimate water quality. The final design resulted in a pond approximately 13ft long x 6ft wide and 3ft 6" deep which would stand 3ft out of ground and which we calculated to be around 1700 gallons.
The ground on which this pond was constructed slopes at an angle of around 10 degrees, but this had been previously levelled as small stock tanks had occupied the area until recently. First we dug out the area to be occupied by the new pond to a depth of around 6" below the pre existing level. Then we added a material called MOT type 1 in order to provide a stable, level and well compacted base on which the concrete base would be laid. Type 1 is use in Lane construction and is a loose fill aggregate that when machine compacted provides a very firm and stable sub base for a wide variety of construction projects. The pictures show the prepared area, with the bottom drain located on a small pad of concrete, and subsequently levelled and glued in place to 4" pressure pipe which will feed the filter system.


With the bottom drain pipe work in place, the sub base firmly compacted, concrete was mixed and prepared and placed around the bottom drain and the pipe work to prevent any movement when the concrete bas was being placed. (see above)
Once our bottom drain pipe work was well secured, we left the supporting concrete to partially cure for 24hrs before we then shuttered the area to be laid to concrete using stout wooden boards and pegs. (see above) The base for this size of pond was designed for 6" of reinforced concrete. 1.5 cu metres of ready mixed concrete was ordered. The mix we used was Gen 3 with plastic fibres already added. The Gen grading system denotes the strength of the concrete and the plastic fibres replace steel mesh reinforcing. Steel is more complex and cumbersome to lay and will rust in concrete unless it is specially protected, especially when used for pond bases. Plastic fibre reinforcement is cheaper, more flexible, provides a much more consistent form of reinforcement, prevents the concrete from cracking (a common problem with steel reinforcement) and is very very strong. Using Ready mix, it took two people 30 minutes to place and level the base. The concrete was then floated using a steel float to provide a smoother finish. After 4-5 hours, the base was floated again to remove fine tramlines and indentations to leave a smooth and level base (see left) which would be ready for final finishing. In this pond, because we floated the base to a very smooth finish, no render would be required on the base, and therefore the concrete itself was brought right up to the top of the bottom drain lip (see below)
The base was allowed to cure for 48 hours before construction of the walls commenced. As this pond was designed to be only 3ft 6" deep, and to hold around 1,700 gallons of water, the walls were constructed of 100mm dense concrete blocks on edge. The choice of this size of block may come as a surprise because we so often see ponds constructed using 9" hollow blocks backfilled with concrete and reinforced with steel rods. For very large and deep ponds this is excellent practice, but here we are dealing with a much smaller entity. Many people tend to get a little carried away and build ponds which would happily survive a small nuclear explosion and use materials which are inappropriate for the amount of water intended to be contained. As it is difficult to calculate the stresses involved with water pressure, this is understandable, but can be very costly! The main critical area of strength required in a Koi pond is the base which must be able to support the full weight of water, and must remain intact even in unstable ground conditions. The weight of water in our pond would be just under eight tons when completed, and the water pressure at the base will be less than 3lbs per square inch - not exactly startling. In addition there will be several simple reinforcing techniques used during the construction which will provide ample rigidity and strength to this type of construction - but read on! Please note that the pond return pipes were built in to the walls during construction, and a small overflow was also incorporated in the far wall (just visible in picture below) .
The first simple step to reinforcing the structure is to incorporate a simple concrete collar around the outside lower perimeter of the newly constructed block wall to a depth (in this case) of around 8". This provides support and reinforcement where it is needed most, and where the pressure will be greatest, at the bottom of the pond. (see below) In this case this collar also doubled as the foundation for the outer facing brick wall which
would provide not only a decorative finish , but further support for the inside block wall. The Outer facing wall when built is 'tied' to the inner wall using steel wall ties built in as construction progresses (see below)
Next, we rendered the block walls with a special render mix of sand and cement in the proportions two soft sand to one cement with 1/2kg of plastic reinforcing fibres added to each full mix. This makes the render very, very strong, completely waterproof and resistant to cracking. It is acceptable to use 1 sharp sand: 1 soft sand: 1 part cement, and this will be easier to apply, but more porous when dry. The render is applied in one coat - no scratch coat and top coat - just one coat which is then floated using a steel float. It is easy to see the strength of the render from the very grey colour, this goes almost white when dry.

The render was allowed to cure fully over the next week before we applied the finish. Here we have used Aquacote, a two part epoxy paint, in green to give our pond a very hard wearing, smooth and glossy finish which looks like fibreglass when applied - but with none of the disadvantages (cost and risk of toxicity). The Aquacote is applied by roller once mixed, with corners and awkward areas finished using a brush. Two coats are required. The painted finish cures fully within 24hours and can then be filled with water (and fish!)
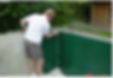
Having completed the inside of our pond, we now constructed the outer facing wall and capped this above the brickwork with a limestone capping. This would later be sealed to ensure no lime could be washed into the pond. Remember when choosing brickwork, that many bricks are very porous - typically the machine made ones are worse and are therefore not as hard wearing as we might like, especially when continually exposed to water splashes. Many of the hand made bricks are stronger, because they are less porous and also look much better aesthetically than machine made bricks. There is the usual disadvantage with hand made bricks - cost !
The filter was then positioned and fitted into place. In this case we used a Nexus 200, but the principle is the same whichever filter you choose. (above ). The inlet from the bottom drain is connected to the input side of the filter and it is important to use a slide valve or ball valve between the pond and filter in order to separate the two for cleaning, maintenance, but most importantly to be able to purge the bottom drain pipe work, where dirt will settle out over time. (see below ) It is always a good idea to try to be neat and tidy with all the plumbing, here the two drains from the filter have been plumbed together into one manifold and then piped away to waste. This saves pipe work, as well as keeping things neat. (bottom left)

On the outlet side of the filter, be sure to use an appropriately sized ball or slide valve to separate the filter from the pond on the return side. Also fit single union connectors to the pump (see picture left) so that this can be removed for ease of maintenance and in combination with the ball valve fitted here, will ensure that there are no floods when the pump or UV are removed! Note that here the pump, in this case an Oase Aquamax 8000, is positioned on the floor and is tucked away close to the side of the filter so that it is less likely to be stepped on or damaged during access to the rest of the filter plumbing.
For the plumbing in this pond we used PVC class E pressure
piping throughout. It is very strong, and whilst by no means
the only option, is to be recommended. Pressure pipe now
costs little more than ordinary solvent weld piping and most
pumps, UVs and other pond fittings such as ball and slide
valves are made to accept pressure pipe. In the picture, the
vertical pipe on the right of the picture leads into the UV
from the main filter pump, just out of view here, but
pictured clearly above. The water is pumped through the
UV, exits the UV on the far left of the picture and is then
pumped through a stainless steel heat exchanger. We will be
heating this pond using oil as a fuel. Water then exits at the
bottom right of the heat exchanger and here the pipe work
splits into two.
One branch leads vertically down and then back to the far side of the pond. The shorter branch feeds through the ball valve shown on the far bottom right in the picture to the pond return close to the filter. Note that a ball valve is always required on the shorter branch when using two or more pond returns in order to balance the water flow between the two returns. If this was not fitted, most of the water would exit from the shorter branch. In this installation we have fitted a stainless steel UV. There are a number of good UVs on the market today, but the Cloverleaf stainless steel version that we have used here provides around 30% more power than a conventional UV for the same purchase cost, and the same running costs. Note that, once again, single union connectors have been used between pipe work and the UV itself. This enables easy removal of the unit for bulb replacement and maintenance. The electrics for the pond were then installed. Here we used an IP rated five way fused switch box to handle the various circuits required from one mains supply. This enables individual control over every element of the installation in safety. The mains supply was connected via an approved RCCB (residual current circuit breaker) unit. The air pump required for the filter was mounted as high as possible and above the water level, close to the filter. In this position, should there be a mains power failure, there is no chance of water syphoning back up the piping into the air pump which would irreparably damage the pump. This model, from the Secoh range is weather proof and very quiet, so needs no external protection from the elements.
And finally, the picture right shows the completed pond, filled with water (and Koi) and happily working as the design intended. The costs to construct this pond, including pipe work, electrics, filter, heating components and all construction materials were in the order of £3000 - so definitely not cheap. This figure does not include labour. Please note that the larger the pond, generally the cheaper the cost per gallon. If you decide to build a concrete pond yourself, supplying your own labour, allow between £1.20 to £1.75 per gallon depending on your design, size and construction materials. If you decide to have the pond built for you, allow a minimum £2.50 - £3.00 per gallon.
Waterfalls , Ponds & water Gardens
Water gardens , Ponds & water features books & Magazines
INDOOR WATERGARDEN, PONDS & WATERFALLS
Watergarden creatures : Plants .. Fish .. Turtles
A step - By - step Guide : - LINER Ponds PART 1 .. PART 2
- Concrete Ponds :PART 1 .. PART 2
Other Materials : Plastic , fiberglass & Other ideas and types of waterponds :
1- Pondless Waterfall : Part one .. Part two .. Part three
2- water garden raised pond :Part one .. Part two
3- Pond viewing window construction : Part one .. Part two
4- Container Water Garden : Part one .. Part two
5- Tabletop fountain : Part one .. Part two
6 - Water Wall : Part one .. Part two .. Part Three
7- Water wheel : Part one .. Part two
8- Hybrid concrete and liner ponds :