Project 2 : Medium difficulty paludarium
Partion by glass or plastic sheet type
Notice the overall more rounded appearance of the shore line and the waterfall in the right hand corner. The height of the wall for the waterfall is about ten inches and the rest of the water level will be seven inches. I have also decided not to use my submersible heater, mostly because it is too long. Instead I will use a side mounted outside heater that is only eight inches long. This heater will be easy to adjust and will be hidden in the waterfall well. The water fall well is constructed of two separate pieces of Lexan (similar to plexi, but more flexible). The front or fall section has been heated and formed to form a two inch slope for the water to flow down. The side of the waterfall is the same material; but 1/2 inch taller to allow the water to flow and not spill into the land area. The rest of the wall is constructed out of a single piece of Lexan, again molded with heat. The power head in the corner will be covered by another piece of Lexan, molded and sloped to form a removable beach. I hope this design will only have three horizontal seams and will minimize the chance of water leaking into the land portion. The material has been checked for square and is just awaiting the addition of the silicon sealer.

Molding the Lexan ( Lexan is a trade name for Acrylic plastic ) :
Shaping the Lexan into the shapes you desire is not that hard. There are two ways that you can do this. You can use a commercial heat gun, which will give you very even heat and will not blister the material easily. The second way is by using a plumbers blow torch. I used the blow torch because it is fast and I have experience in their use. Either method you choose you must be careful as both the equipment and material will get VERY HOT. I started by cutting my material into the widths needed. Once this was done I started to form them with the torch. First I measured where I wanted my bend to start and I drew a line to mark it. Once I had the line I placed the material on a flat level surface with the line extending out over empty space. I then started moving the torch in a back and forth movement over the entire width. I also repeated this on the underside. You must be careful as you do this as the material is flammable and can catch fire and ruin the whole piece. Once the material had become pliable I placed a small board perpendicular to the line. I then carefully bent the material into the shape I wanted. You must be fairly quick as the material will re-harden quickly. As you can see from the pictures the blow torch will distort the material, but for me this is fine as it will not be visible. You can do this with the heat gun as well and the lines will be more clear, but it will take a longer time. Click on any thumbnail for a close up picture.


Gas tourch will be used here to bend the acrylic plastic sheet
Using the wood piece to fold the heater plastic ( Be Aware and Careful and apply all the safety measures here )


To install the transfer pipe to transfer the water from side to side , We need to cut holes by using drill with Circular saw tool , with same size of th pipe ..


The plastic sheet which will be divided the land from water areas ready to fix in the 55 gallon tank .
Sealing the Lexan:
As you can see from the pictures the holes for the PVC piping that will be buried are cut using a hole saw. This type of saw will give you a perfectly round cut with very little burring of the Lexan. You could also use a spade point drill bit for this, but the cut may not be as round. No that all the bends ands cuts have been made the form is ready to be siliconed into the tank. If you look closely on some of the pictures you will see a series of lines. I measured out the tank dimensions and drew them on the wood. This gave me a better idea of how I wanted my layout to be. Now that everything is ready and I have my tank it's time to seal it up. After looking up different silicones on the web I found that GE silicone I #012a is suitable for aquarium use. You must be careful because types many contain mildicides that will be harmful to your inhabitants. I placed my completed form into the tank and positioned where I wanted it. I again checked for square on the waterfall portion. Once I was satisfied all was well I applied tape to hold everything in place. Once this was done the silicone was applied in a slow even bead. I like to run my finger gently across the seams top make sure of good penetration. Once done I will allow it to cure overnight. Next I inspect the dried silicone and apply more to the areas that I could not get the first day and to the PVC tubing that connects the two sides. While that is drying I cut with the table saw the fiberglass background into the height and lengths I will need to hide the Lexan. Again I will let this cure overnight. I once again inspect all seams and corners. If I am satisfied now the water test will be next. With the tank on a level surface I will fill the water area up and check for leaks. Once again I will let this sit overnight, it may seem overkill but I want to make sure I will have no water leaking into the land portion because I do not want to land up with a mudbowl. With all the leak testing complete I am now going to hook up the pumps and regulate them. I want the Micro jet ( Trade mark for Pump)to pump more water than the Dueto filter( Trade mark of filter ) . This will keep the waterfall well full at all times and let the Dueto filter the water in the well. While this is running I will measure for the beach area and cut and form the Lexan. This has completed the construction phase. The next section will show the addition of the rockwork and other items that will hide the Lexan and hopefully bring the Paludarium to life. Click on any thumbnail for a close up picture.


Top view of the tank and the arcylic sheet divider and the pipe connector .
Gluing the waterfall section .. we can see the folded arcylic sheet to drop the water ..
Gluing the pump section of the paludarium .. we can see the pipe which transfer the water to the waterfall section
Water fall chamber or section which water will be gathered here ..
waterfalloulet
pipe from pump or filter chamber
Testing with water only without any decoration materials ..to descover any leaks from water to land area
Dueto filter pipe

Tank completed with plastic divider inside
-The equipment :
courtesy to : www.badmanstropicalfish.com
equipments and supplies used in this project :
1- GLASS AQUARIUM :
The All-Glass standard size aquarium is made with care to assure that it can stand up to almost any application. Designed for both tropical or saltwater set-up, these aquariums come in a wide range of sizes as well as black, walnut, oak and cherry trim styles.
To complement the fish tank I will use a matching versa top. These tops are made to fit into the aquarium frame. I will be modifying the top to incorporate some screen material for ventilation. I may even make one whole side screen. We will see.
2-VERSA-TOP™ GLASS TOPS:
These glass tops are perfect for reducing evaporation and keeping fish from jumping out. Suitable for tropical or saltwater set-ups, each Versa-Top™ has a Super-Flex™ Hinge that allows the lid to stay open without holding for easy feeding. A clear vinyl back strip can be easily cut out to accommodate a heater, filter and other accessories. These tops are available in black and oak trim styles.


Galss cover for the tank .. the tank size must fit with it's cover ..
55 gallon glass tank
3-TWIN-TUBE AQUARIUM LIGHTS
Brighten up your aquarium life with twin-tube lighting. Twin-tube fluorescent aquarium lights are specially engineered to create a new level of lighting for your aquarium. Dual tube lighting gives you increased light output for more beautiful displays of your aquarium set-up. Each light includes two full length fluorescent tubes that evenly distribute light in your aquarium. The fluorescent ballast is mounted inside the light housing and gets longer life because of aluminum heat dissipater's and extra vents.


4-Duetto Multi Filter by
Aquarium Systems
Although Filtration is said not to be needed in these set ups, I am from the old school and wish to have some in mine. I chose the Dueto because I have heard good things about it and it appears to be the smallest submersible power filter available. The following is the manufacturers write up and pictures, as well as my actual photos of the parts.
The Duetto Multi Filter features separate components for mechanical, chemical and biological filtration which allows for easy cleaning and replacement of the mechanical and chemical filters without disrupting the biological filter. With an adjustable aeration feature that mixes filtered air with pumped water to improve oxygen/carbon dioxide exchange. Can be positioned vertically or horizontally in the tank, allowing it to adapt to many applications.
A twin bulbs light hood strong enough and bright to pentrat deep in the tank to the bottom of the water part of the paludarium
5-MICRO-Jet Adjustable Flow Miniature Pumps :
Exceptional pumping capacity with the smallest size. Ideal for the small environments and low water levels in terrariums.


6-Top Fin Aquarium Heaters
Printed circuit board technology to maintain accurate temperatures, energy efficient, moisture-proof and precision design. Lifetime guarantee. Recommended size - 5 watts per gallon. CSA approved.
I was going to use an existing submersible heater I had. The length of the heater made it impossible for me to hide it. I chose this type because I can mount it on one of the wall of the tank. Although I prefer Ebo-Jagar, They do not make one that suits my needs. I will keep my fingers crossed!


7-Various plumbing fittings used to connect the two sides together
I purchased the plumbing fittings at my local Home depot. These include the 1/2 inch PVC piping, two 90° elbows (one of which is threaded to accept the barbed fitting), two straight connectors (one of which is threaded to accept the other barbed fitting), two barbed fittings (one to connect with plastic tubing to the micro jet the other to add force to the flow at the other end.) and a tube of aquarium safe sealant.


Electrical heater used .. and to be sized as per water capacity of the water part of the paludarium not of the overall tank size .. normally we consider to be 1 watt for 1 liter of water .
Plastic Plumbing fitting , silicon , pipes will be also used
- The Construction :
The Plan :
- Decoration :
With the tank sealed and leak tested it's time now to try to hide everything and give the set up a realistic appearance. My theme is going to be a small cross section of a rocky stream. This was determined when I went with the"Divided land and water area" method of construction which gave me a fairly tall vertical wall area. (( For more information about how to divide the land and water areas click here ))
The width of the standard fifty-five does not allow much room for a gradual slope. I was a little concerned on how I was going to hide the Lexan and at the same time preserve as much water area as I could. I thought of a couple of different ways. One was to smear silicone over the Lexan and cover the walls with small river stones, another thought was to glue small pieces of rock to the sides until it was completely covered. While I was in a local shop I found a rocky background made out of plastic and fiberglass, that was only 1/4 of an inch thick. I bought this and tested it for color fastness under water. I then cut it into pieces 1/8 of an inch higher tan my Lexan walls. Then I cut it into smaller pieces to glue on the Lexan face. There are some small white lines where the cuts were mad but I am hoping that algae and other materials will hide them from view. Click on the thumbnails for a larger view.


rocky background made out of plastic and fiberglass can be cut and glued on the lexan ..
Due to the steep wall of the riverbank, I am concerned the semi-aquatic animals will not be able to easily climb out of the water section. I have made a sloping "beach area" that will allow the animals to swim up to and crawl onto the land. This area will be opposite the waterfall and above the micro jet pump. Because I will need access to the pump every now and then I have to make the beach removable. I silicones a cross brace in the front area and make a supporting column in the back. To add a little realism to the beach I covered the Lexan with sand. I have dry fitted the filter and heater in the waterfall well to make sure it will fit properly, it looks like everything will be fine. Click on the thumbnails for a larger view.


small rocks or bebbles used to decorate the waterfall to be more natural in apperance , sillicon glue used for attach the rcks or bebbles ..
The Waterfall chamber or section and we can see the filter and the heater
Sand can be used with slicon to cover the lexan by using the sillicon glue
The next step is to fill the land area. It is very important in wet environments to have good drainage in the soil. To help with drainage the bottom layer will consist of round landscape stones. This layer will be an inch or so thick. On top of the the stones I will place a layer of landscape fabric to keep the soil separated from the stones, this will also make it easier if I have to change the soil. On top of the fabric I am placing a layer of charcoal, this will help sweeten the soil and control odors and other bad elements. The final layer is the soil itself. I chose a very lite mix with no added fertilizer. It said it was suited for terrariums and I hope will do fine.


Last layer is the potting soil for plants ..


The first layer of rock will be batch inside the land area
Then the mesh or fabric with very tiny holes to separate the soil from rocks ..
Third thing is the charcoal to remove the odor and the bad elements .
With the land side completed it is now just a matter of finishing the water side. As this is suppose to mimic a small stream with a waterfall, I am going to use a few different materials for the bottom. Near the waterfall I will use larger round river stones placed in a pile, to show that they have fallen from the bank from the water flow. The main channel of the stream will be the medium sized river stones, I purchased from the local shop. The inner bend and the beach area will be a fine sand material. I am trying to think how flowing water would separate the materials in nature.


Gravel for aquarium part wil be placed on the bottom of the tank .. to mimic the real nature it is better to select several sizes and colors but match each other with land area
This completes the basic set up of the land and water areas. I now will place some driftwood pieces and rockwork to complete the landscaping. Once this is done I filled the set up with water and started a run in period. During this period I will be making constant adjustments and looks. Once I am fairly satisfied I will add the plants next to give them a chance to establish themselves. You may have noticed that I have deviated from the traditional sloped back appearance of the Paludarium, these pictures may explain why. If you look you can see that the set up is on a stair landing and will be visible from the front and back. This also was the determining factor in the depth of the water. I made it just as deep as the overhang, this way I will not see a dirt line when viewed from the back. On the next page I will show the plants I have chosen with pictures and care sheets.


-The Plants :
With the finishing touches of the set up complete and the trial run through working well I decided it was time for the terrestrial plants. I will list the plants I have used here and also provide a care type sheet for each. First I would like you to notice a couple of changes in the set up. First in the corner by the waterfall, the lava rock has been replaced by cork bark, this was always my plan and the rock was just temporary. The next thing are the driftwood branches and vines. The original wood was a natural product called grapevine, It was very nice ,but it started sprouting some sort of growth during the run in and I really did not want to use it. I went to the local store and they carry a branch like product made by "Kritterz" a similar product line is made by T-REX it is flexible and posable and really looks life like. There was also a Kritterz Bio Vine material that I used to run along the back. I really like this stuff and so far would highly recommend it. The terrestrial plants I have chosen were bought at a local home depot. I am not totally sure if these plants are the proper ones for my set up, but I will find out. The air plants were bought at a local pet shop and are secured to the bark by the waterfall. I also have a box of assorted aquarium plant bulbs from aquariumplant.com It looks to be about 8 to 10 different bulbs. These are my starter plants and I'm sure I will be adding and deleting some.

Terrestrial plants :
1- Creeping Ficus :
Scientific Name: Ficus pumila L.
family: Moraceae
Common name: Creeping Fig
Average Size: creeping, climbing habit
Sun Exposure: Partial shade, light shade
Origin: China, Vietnam, Japan, Australia.
Growth Habits: Self attaching vine, will grow slowly to cover any size enclosure.
Watering Needs: Regular moderate watering for optimum growth
Propagation: Seeds, cuttings under mist, offsets
Pests: spider mites

2- Pothos Ivy
Scientific Name: Epipremnum aureum
family: Araceae
Common name:Pothos Ivy, Golden Pothos, Devil's Ivy
Average Size:vining habit
Sun Exposure:Partial shade, light shade
Origin:Solomon Islands in the Pacific.
Growth Habits:Self attaching vine, the greater the light the more variegation.
Watering Needs:evenly to moist to slightly dry.
Propagation:leaf cuttings with stem nodes and roots
Pests:two-spotted mites

3-Maidenhair fern :
Scientific Name: Adiantum tenerum L.
family: Pteridaceae
Common name:Brittle Maidenhair, Delicate maidenhair fern
Average Size:maidenhair fern grows 6 - 20 inches
Sun Exposure:Low to medium light
Origin:South America.
Growth Habits:triangle-shaped leaflets with shiny black stems.
Watering Needs:Keep soil wet at all times.
Propagation:Divide the rhizomes, the thickened roots from which the leaves sprout.

4-Parlor Palm
Scientific Name: Chamaedorea elegans
family: Arecaceae
Common name:Parlor Palm, Table Palm
Average Size:3` to 4`
Sun Exposure:Partial shade, light shade
Origin:Mexico and Guatemala.
Growth Habits:terrariums, dish gardens to tabletop and Floor containers.
Watering Needs:evenly moist
Propagation:easily by seed and sometimes division
Pests:mostly pest free, could have spider mites.

5-Polka Dot plant
Scientific Name: Hypoestes sanguinolenta
family: Acanthaceae
Common name:Polka Dot plant, Freckle Face, Measles Plant
Average Size:Grows 5" to 12" tall
Sun Exposure:bright light but not full sun
Origin:Native to Madagascar .
Growth Habits:keep it pinched back to no taller than about 12 inches.
Watering Needs:Should be kept slightly moist
Propagation:by seed, or by cuttings taken at any time.

Air plant
Scientific Name: Tillandsia circinnatoides ?
family: Tillandsioideae
Common name:Air plant, Tillandsia
Average Size:Grows 5" to 10" tall
Sun Exposure:Bright filtered light
Origin:Mexico to Costa Rica .
Growth Habits:keep it pinched back to no taller than about 12 inches.
Watering Needs:Thoroughly wet 2-3 times per week, mist between waterings
Propagation:offsets
Web Site:Tillandsia International

Air plant
Scientific Name: Tillandsia juncea ?
family: Tillandsioideae
Common name:Air plant, Tillandsia
Average Size:Grows 8" to 12" tall
Sun Exposure:Bright filtered light
Origin:Florida, Mexico, and the West Indies to Southern Brazil
Growth Habits:keep it pinched back to no taller than about 12 inches.
Watering Needs:Thoroughly wet 2-3 times per week, mist between watering
Propagation:offsets
Web Site:Tillandsia International

Aquatic Plants :
1-Duckweed
Scientific Name: Lemna minor
family: Lemnaceae
Common name:Duckweed
Average Size:1-15mm (1/2 inch max)
Light:low
Origin:Worldwide
Growth Habits:prolific, harvest when it becomes too dense.
Water:
PH:4.5 to 7.5
Hardness:Soft to hard
temperature:32°- 90°+ F
Propagation:seed and vegetatively, thought during the growing season, nearly all plants arise by vegetative reproduction

2-Banana Plant
Scientific Name: Nymphoides aquatica
family: Menyanthacees
Common name:Banana Plant
Average Size:6 inches
Light:Bright, normal or artificial light.
Origin:The Atlantic coast of North America (mainly Florida).
Growth Habits:1-2 leaves a month.
Water:
PH:4.5 to 7.5
Hardness:medium
temperature:55°- 80° F
Propagation:by division of the shoots that grow on the leaf stalks. The shoots will grow tufts of small swollen young roots.
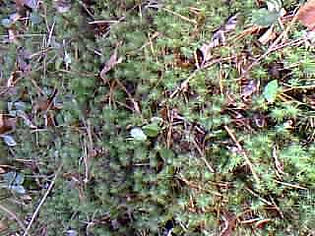
3-Mosses
These are some native mosses I recently found on my vacation. I have found their scientific names , but little as far as care. They both like the moist humid air of the set-upc and I hope will cover the ground nicely.


The tank after planting
-The inhabitants :
With the plants doing well and the tank now cycled with the Zebra danios I decided it was time for some other types of inhabitants. I Am new to this and will choose common easy to care for species to start. I also will have a mix match of biotopes. In the future as I gain experience I hope to make a true to nature cross section of an environment. For now it will be a learning curve for me. These are my starter animals and I'm sure I will be adding and deleting some. I will start with a copy of my planting scheme to show the general layout of the setup and why I hope each particular animal will do well.
Terrestrial Animals

1-Green Anole
Scientific Name: Anoles carolinensis
Common name:Anole, Green Anole
Average Size:Five to eight inches
Temperature:Daytime temperature 75F - 90F . Nighttime temperature 60F - 70F.
Origin:Common in the southeastern U.S.
Habitat:Requires greenery, occassional shade and a moist environment.
Temperament:Males rarely tolerate other males within their visual range
Food:
-
A diet consisting of a variety of vitamin/calcium dusted insects such as:
-
Crickets
-
Mealworms
-
Waxworms
Other worms that may be included in their diet include:
Earthworms, Red wigglers and Butterworms
2-White's Tree Frog
Scientific Name: Litoria caerula
Common name:White's Tree Frog
Average Size:Three to four inches
Temperature:Daytime temperature 76º - 84º. Nighttime temperature 70º - 75º.
Origin:North & Eastern Australia, New Guinea and parts of Indonesia.
Habitat:Requires greenery, occassional shade and a moist environment.
Temperament:Usually quite docile and shy
Food:
-
A diet consisting of a variety of vitamin/calcium dusted insects such as:
-
Crickets
-
Mealworms
-
Waxworms
Other worms that may be included in their diet include:
Earthworms, Red wigglers and Butterworms
3-Green Tree Frog
Scientific Name: Hyla cinerea
Common name:Green Tree Frog
Average Size:Up to about 2 1/2 inches.
Temperature:Daytime temperature 68º - 77º. Nighttime temperature 60º - 70º.
Origin:
Common in the southeastern U.S.
Habitat:Requires greenery, occassional shade and a moist environment.
Temperament:
Males rarely tolerate other males within their visual range
Food:
-
A diet consisting of a variety of vitamin/calcium dusted insects such as:
-
Crickets
-
Mealworms
-
Waxworms
Other worms that may be included in their diet include:
Earthworms, Red wigglers and Butterworms
-Aquatic animals :
1- Zebra danio
Scientific Name: Brachydanio rerio
Common name:Zebra danio
Average Size:up to 2 1/2 inches
Food:Flake, frozen or live.
Origin:Asia: India to Bangladesh
Water:
PH:6.5-7.2
Hardness:Soft, medium-hard
temperature:65°- 78°F.
2-Scientific Name: Betta Splendens
Common name:Betta, Siamese fighting fish
Average Size:up to3 inches
Food:Flake, frozen or live.
Origin:India, particularly the Malay Peninsula, Singapore, Thailand
Water:
PH:6.5-7.2
Hardness:Soft, medium-hard
temperature:70°- 88°F.
-Semi Aquatic Animals :
1- ROUGHSKIN NEWT
Scientific Name: Taricha granulosa
Common name:roughskin newt, Oregon newt.
Average Size:six to seven inches long.
Temperature:lower 70s.
Origin:American Pacific Northwest
Temperament:Oregon Newts will eat smaller newts, but can be safely housed with other newts their own size.
Habitat:Semi-terrestrial, with land area and several inches of water.
For a large part of the year, they live in burrows at the edge of ponds or stream preferring slow-moving water with a lot of vegetation.
the land area should be lined with moss or leaf litter, and should misted daily to keep it damp.
Food:worms, small fish, frog eggs, tadpole, tubifex worms, insects, small earthworms, small fish and sinking fish food pellets.
2- FIRE BELLY TOAD
Scientific Name: Bombina orientalis
Being new to all of this I purchased these toads because I thought they were really nice looking. I ask the person at the pet store if these were good for my set up. Of course I was told they were. What was not mentioned was that they secrete a toxin into the areas they inhabit that will make other frog species ill. I did not wish to limit myself to this species or have toxins in my water. I have moved them into another set up I made with spare parts.
Common name:Fire belly toad
Average Size:Two to two and a half inches
Temperature:Between 72 and 78 degrees. The humidity for these toads should be kept at or near 80 percent.
Origin:North-eastern China and Korea
Temperament:Generally get along well with each other and other frogs. They may eat smaller frogs, newts, or fish.
Habitat:
Three to four inches of water and a couple of rocks or floating things to rest on. Must have a lid because they can climb out.
Substrate: Gravel is fine on the bottom. If there is a lot of land area, moss woks well.
Food:
Crickets, earthworms, waxworms, fish, and mealworms.


